Introduction
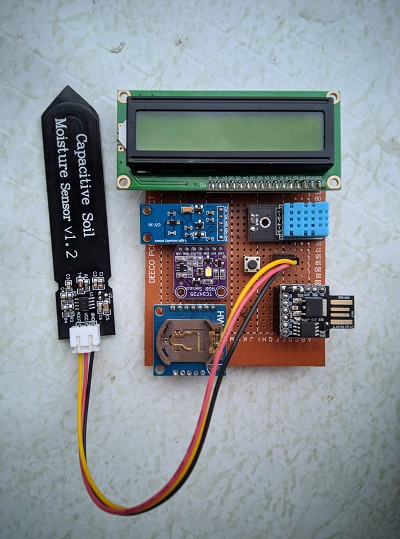
Around late 2019, I ordered a bunch of sensors and modules for tinkering - mostly sensors useful for gardening. The finished product consists of sensors which measures the variables listed below:
- Temperature and Relative Humidity
- Soil Moisture
- Light Color in RGB
- Light Intensity
I’ve also added a Real Time Clock module and 16x2 LCD Display. The project runs on a Digispark board to minimize cost and to mess with ATtiny based chips - in this case, the ATtiny85.
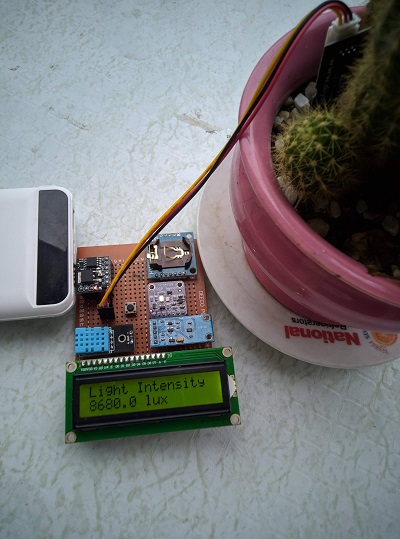
This module was made to quickly evaluate growing conditions on certain spots of the house. It’s not really meant to be permanently placed on a growing setup for data gathering. Rather, I plan on storing it in a toolbox as a quick measuring device for the variables listed above.
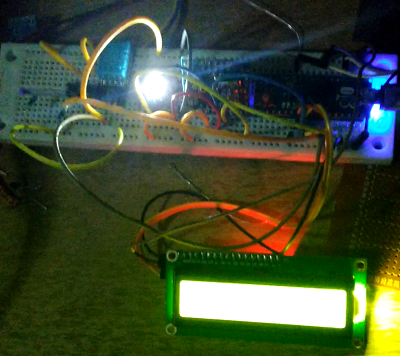
The working prototype was completed last May 2020 and it’s been on the cabinet for a while after I made it work on a breadboard using my Arduino micro. It was only until November 2020 that I picked it up again and modified the Arduino sketch to run on my Digispark board to finish the project.
Wiring
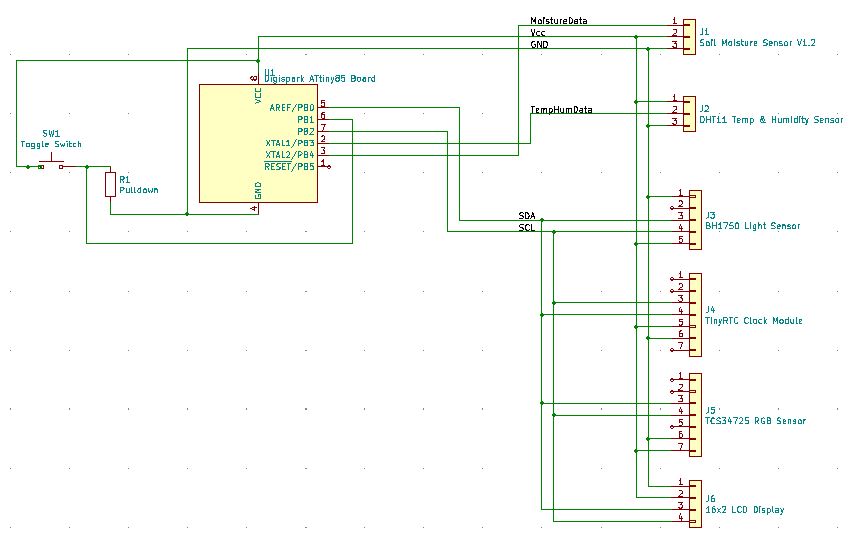
Despite having the Digispark board only 6 I/O pins (including the Reset pin), it can accomodate a whole lot of sensors by utilizing the the I2C Bus.
Modules used
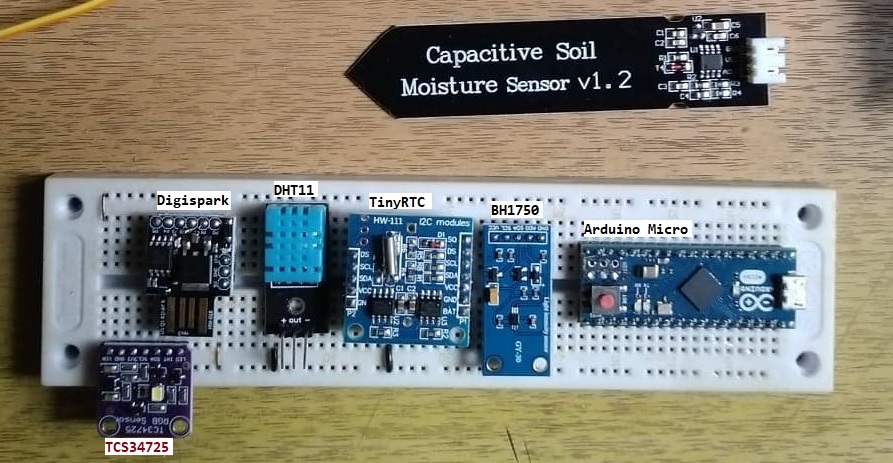
- DHT11 Temp & Humidity Sensor - 1 digital pin
- Soil Moisture Sensor - 1 analog pin
- TinyRTC Clock Module - I2C 0x68 address
- TCS34725 RGB Sensor - I2C 0x29 address
- BH1750 Light intensity Sensor - I2C 0x24 address
- 1602 LCD Display - I2C 0x27 address
Dealing with Digispark / ATtiny
GrowEnv-Sensor Repository
Creating a simple sketch to make these sensors and modules work with the Arduino Micro was pretty easy with the libraries available online.
However, it is a different story when dealing with ATtiny based chips. Specifically with finding libraries for the sensors that I am using since the Digispark board only works with the Tinywire library - of which is the backbone for a most sensor libraries such as the BH1750 Light Intensity Sensor. Some have ports for Tinywire such as TinyDHT and TinyRTC.
Luckily, there is ATTinyCore - an Arduino Core for the ATtiny processors which allows us to use Wire.h and its supporting libraries. Meaning, we can just treat the Digispark board like an Arduino Micro which we used for prototyping this project.
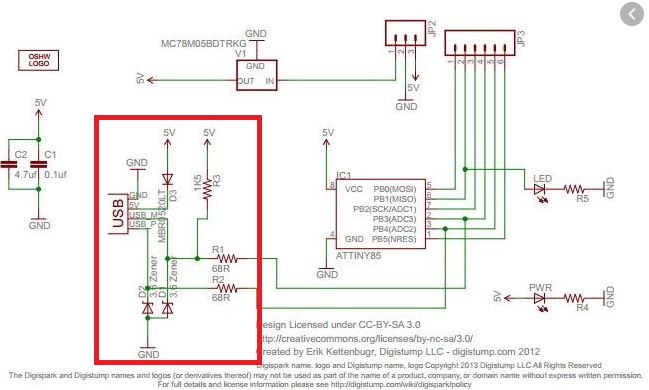
I wasn’t able to cram in the RGB Color Sensor functionality due to the limited merory of the Digispark. Also, the Soil Moisture Sensor readings are kinda wonky probably due to the low input impedance of ADC since it shares pins with the USB data lines which requires specific components to work (shown below)
Limitations of Digispark
- It can only accomodate 6012 bytes for uploading sketch.
- Most of the functionalities share I/O pins to achieve this form factor.
- Following the point above, ADCs have low input impedance and might affect your readings.
- For Digispark clones (like mine), P5 is assigned to RESET and you’ll need an ISP to remove it and utilize for other functionalities.
Work to be Done
- Optimize the code to fit in the code for the RGB Color sensor
- Find a work around to make the Soil Moisture sensor properly work with the ADC limitations
- Add a USB extension for easier connection to powerbank
- Simple enclosure / Standoff to prevent shorting at the back